How to reissue a voucher


Reissuing a voucher is very simple. Here’s how to go about it.

Sometimes it may be necessary to reissue one of your vouchers to a customer. Thankfully, it only requires a couple of steps.

Reissuing

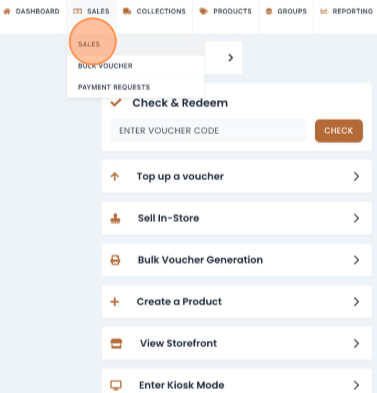
Jump to the Sales tab on your storefront.


Find the voucher sale that you want to reissue. If you can’t see the voucher in your list, you can also use the search function in the top right of the listings box.


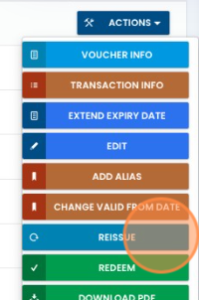
Once you’ve found your voucher sale, on the right right hand side, select “Actions” and then “Reissue


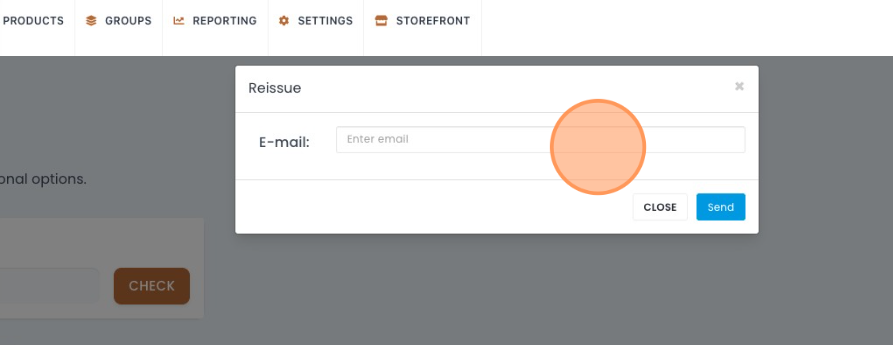
Enter the email you want to reissue the voucher to, and hit Send.


The recipient will then receive the newly reissued voucher in their email. Rejoice!

124 views

Adding your gift vouchers to your Apple Wallet.

The Wallet app lives right on your iPhone. It’s where you can securely keep your gift vouchers and a lot more. It works with iPhone or Apple Watch, so it’s a great way to have your gift voucher on hand with the touch of a button 😃

To add your gift voucher to your Apple Wallet couldn’t be easier. Let me show you..

Once you have made a gift voucher purchase, a pop up will appear – Click Add to Apple Wallet.

Once your gift voucher is downloaded, you can go to your Apple Wallet anytime to access your gift vouchers.

That’s it, now it’s time to visit your favourite venue and enjoy your gift voucher!

If you need a hand with anything, just let us know. We’re always happy to help 😊

800 views

UpdaChanging your storefront logo only takes a minute.

To change the logo displayed on your storefront, head over to Settings – General Settings.

The first thing you’ll see is Upload Your Logo under the Store Details section. This is where you can change your storefront logo.

Drag an image from your computer into this blue box, or click to upload from your computer files.

Please bear in mind that there is a 4mb file size limit. If your logo is bigger than this, please reduce the file size of the image using a program like Photoshop, or a free image compressor, such as https://compressor.io/.

The logo dimensions should ideally be 1280x1280px.

You can use the toggle to change the logo size if required.

Once you’ve added your logo here, click save and you’re good to go. That’s all there is to it, you should be able to see your new logo showing up on your storefront now.

If you need a hand or have any question, we’re always happy to help 😊

73 views

How to Add Google Analytics to Your Store


Google Analytics lets you see how your visitors are interacting with your store.

Adding the Google Analytics tracking code to your Voucher Connect store is nice and easy. 

I’ll assume you have already set up a Google Analytics property for your website. If you haven’t done that yet, follow these steps first.

Once Google Analytics gives you your tracking code, select it all, and copy it to your clipboard by right clicking and selecting copy, or using the keyboard shortcut CTRL + C or CMD + C on MacOs.

Head over to dashboard.voucherconnect.com and sign into your account if you haven’t already. 

Once you’ve signed in, click on Settings, and go to Store Settings. Scroll down until you find the Tracking Code For All Pages box.


Paste your Google Analytics tracking code in here by right clicking inside the box and clicking paste, or you can use CTRL + V or CMD + V if you’re on MacOS. 

Scroll down to the bottom and click Save Settings. 

That’s it, you’ve added your Google Analytics tracking code to your Voucher Connect store. 

141 views

How To Make a Test Purchase


Make a test purchase by temporarily enabling Test Mode on your voucher product.

To make a test purchase, log in to your dashboard, and click on Products on the main menu to load a list of your voucher products. Select which product you would like to test, and click on the edit button for that product. 

Click through the settings, until you get to the last section. Here you will see the Test Mode button. If you switch that on, test mode will be temporarily activated for 30 minutes.

Click Finish, to save your settings.


Now that your voucher product is in test mode, pop over to your voucher storefront to make a purchase. You will be able to make a purchase like a customer but no payment details are required.

Important note: 


When test mode is enabled on a voucher product, your customers will be unable to purchase that voucher until test mode is disabled again. 

To ensure your test mode is not accidentally left enabled, we have added a timer so that after 30 minutes, test mode will automatically disable. 

We also display a warning on the store while test mode is enabled, to keep your customers informed. 


If you need a hand with anything, we’re here to help 😃

138 views

Get A Demo

Leave your name, phone number and email address and we will be in touch to arrange a demo.

Boost revenue by 62% ?

The gift card solution that costs less and delivers more