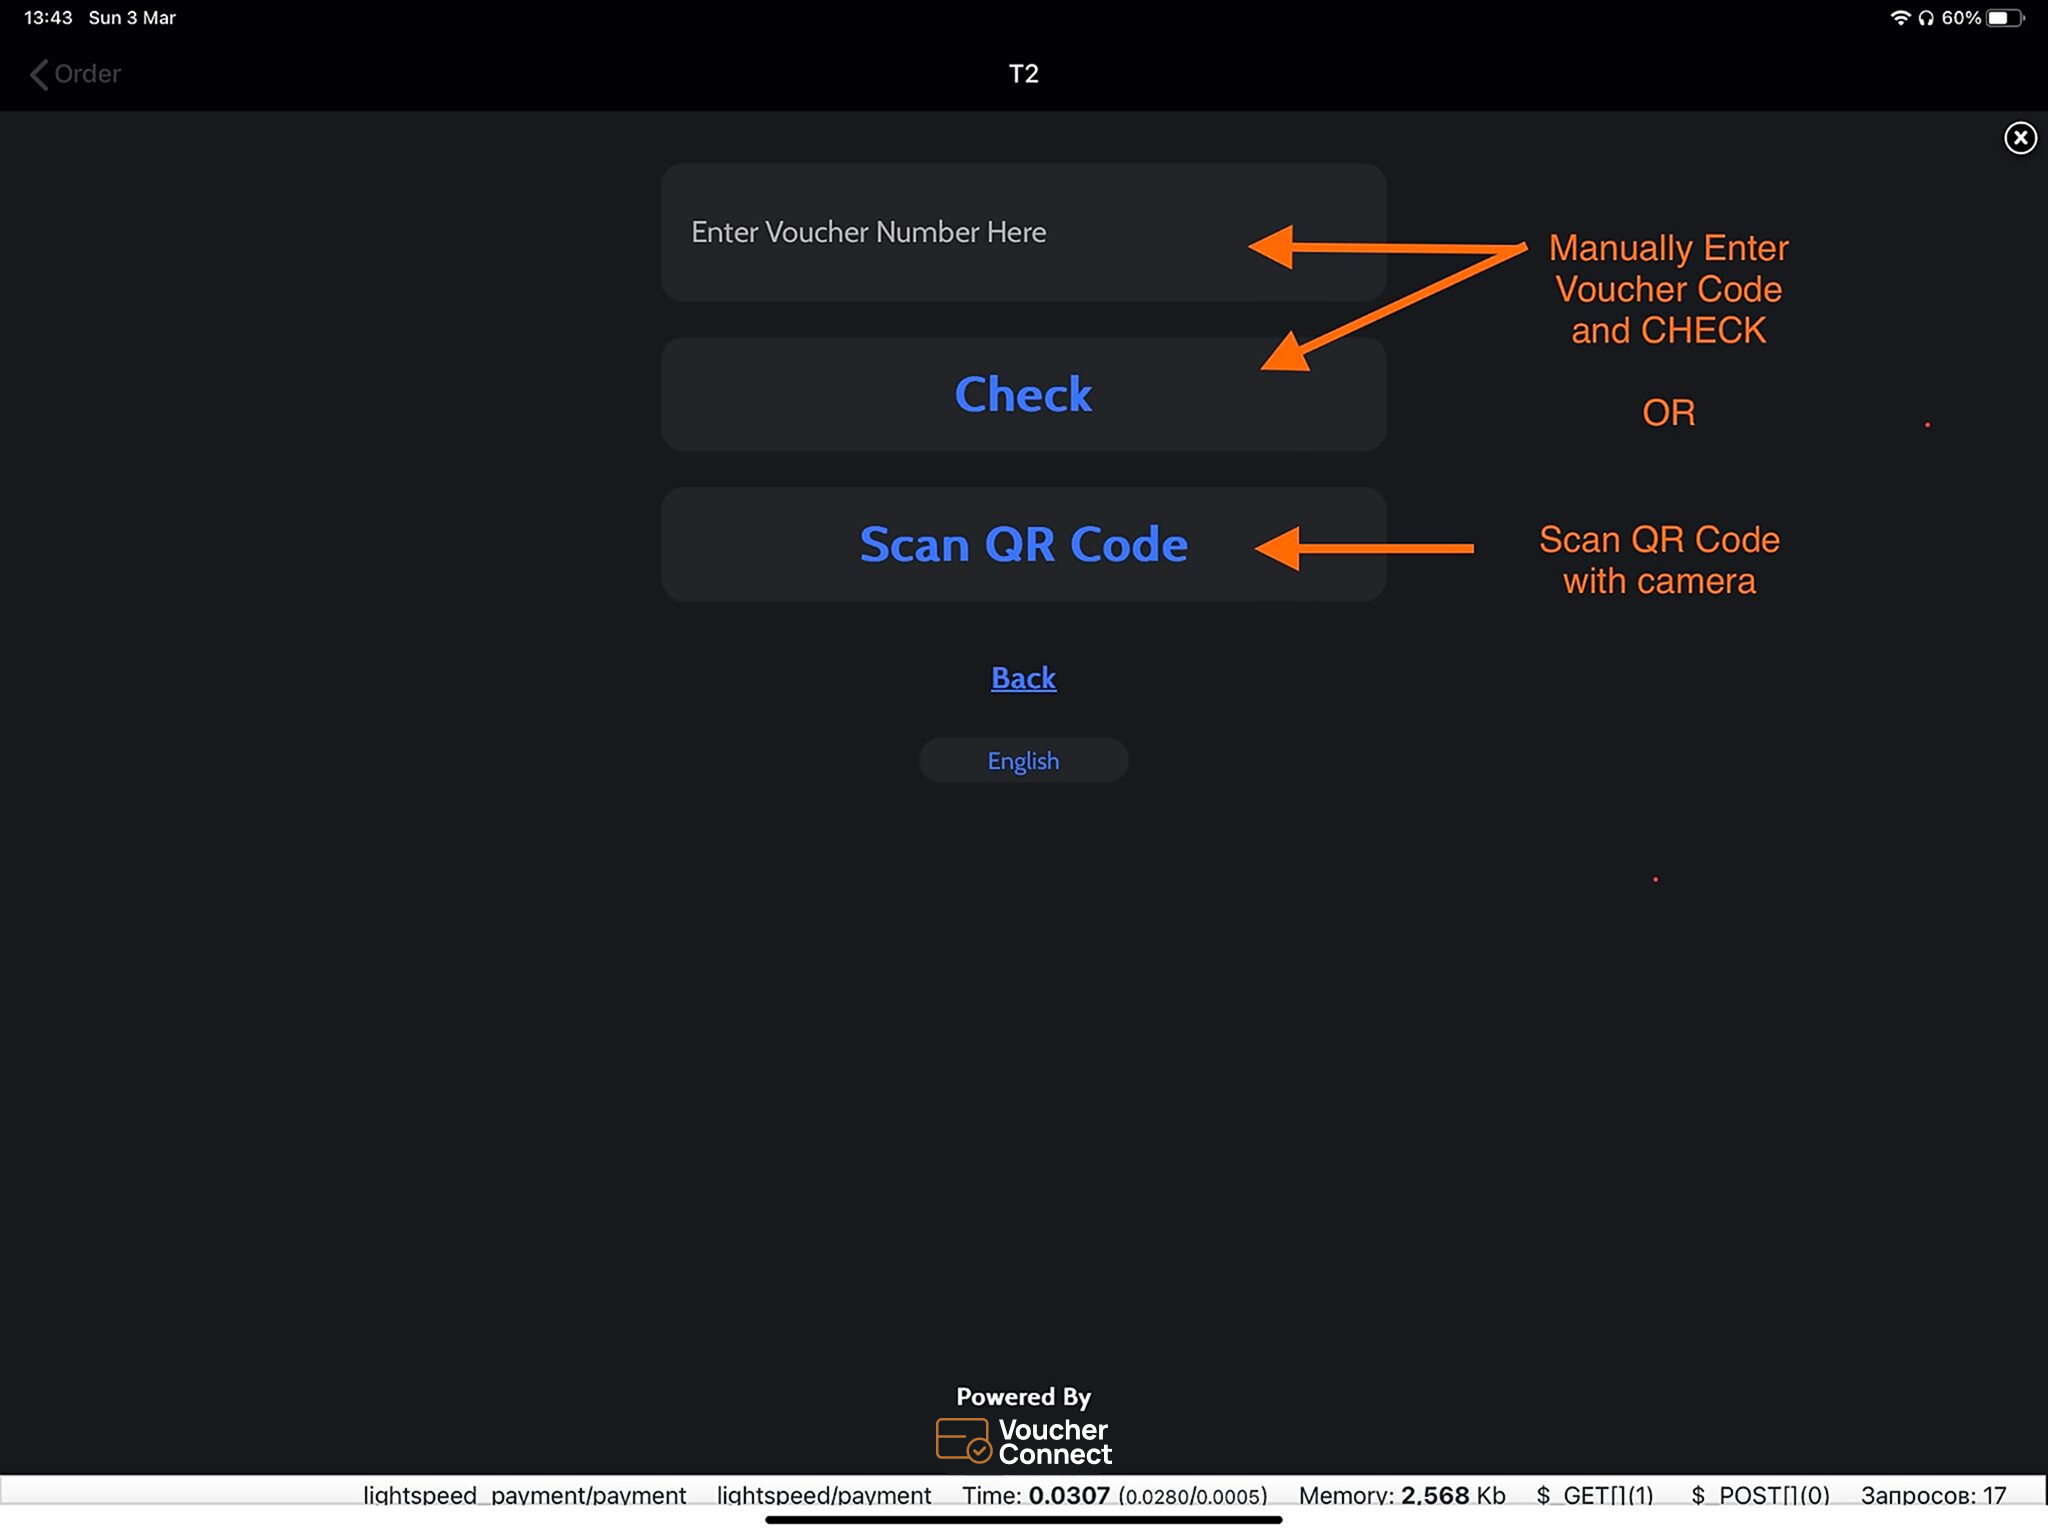
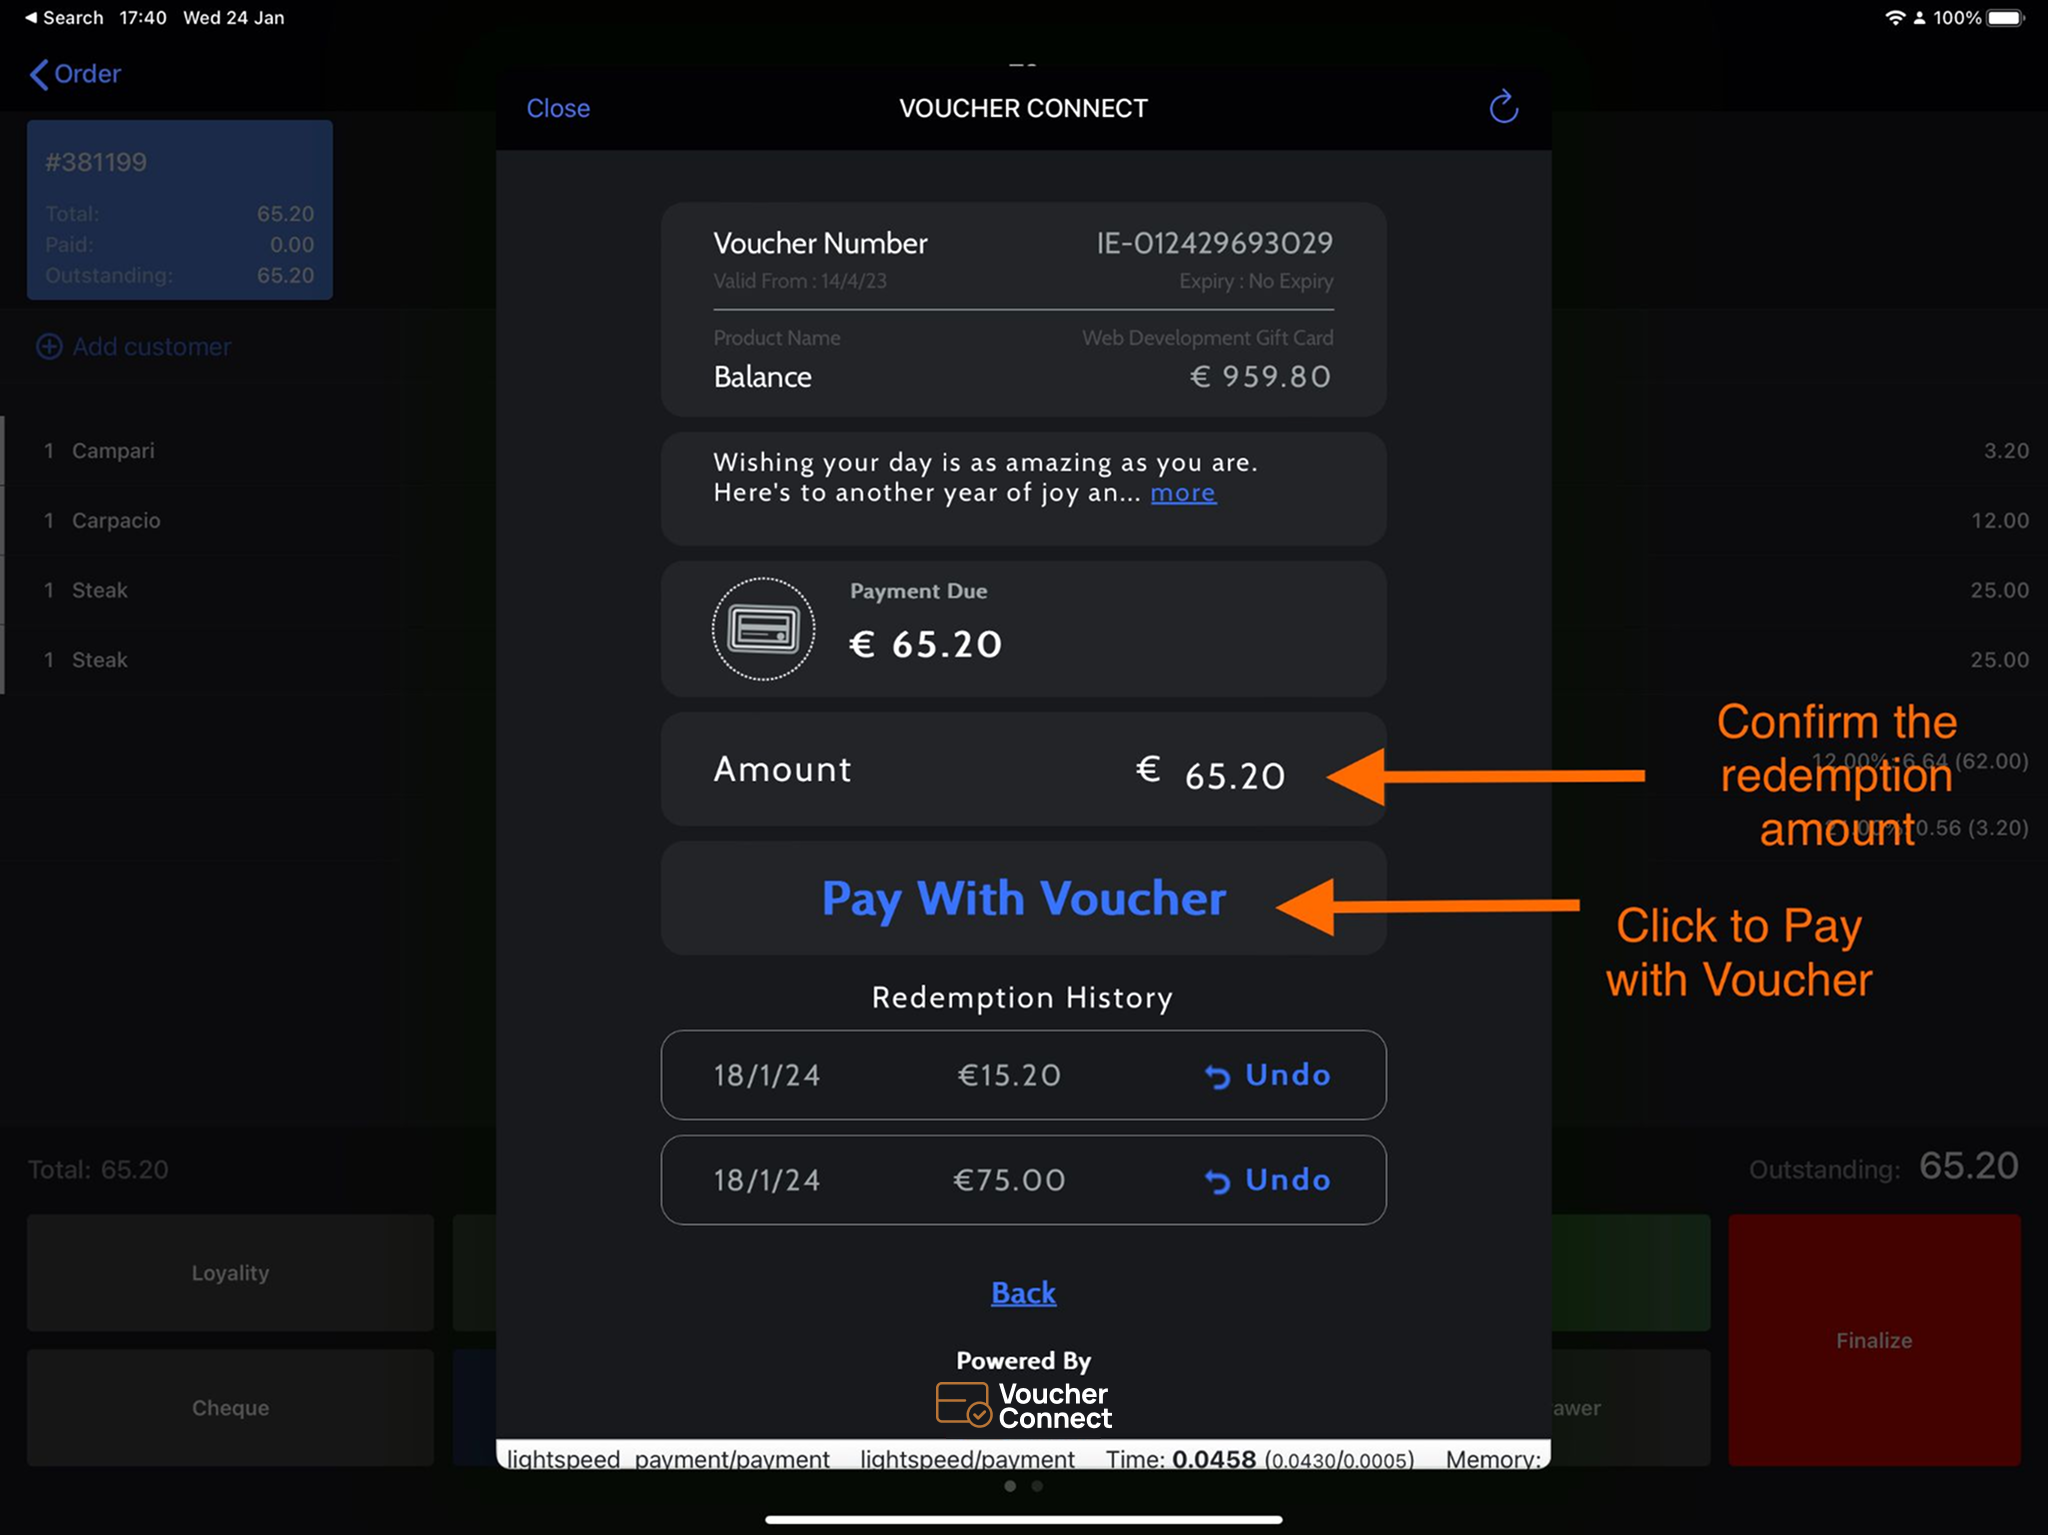
How to redeem a voucher in Lightspeed (L-Series)


Copy your Clover Merchant Name ID:
Sign into your Clover account in a new browser window. This will open your dashboard.
1. Now Select Setup from the lefthand side menu bar
2. Select Merchants from the lefthand side menu bar
3. Copy the Merchant Name ID – this is located below the Merchant Name

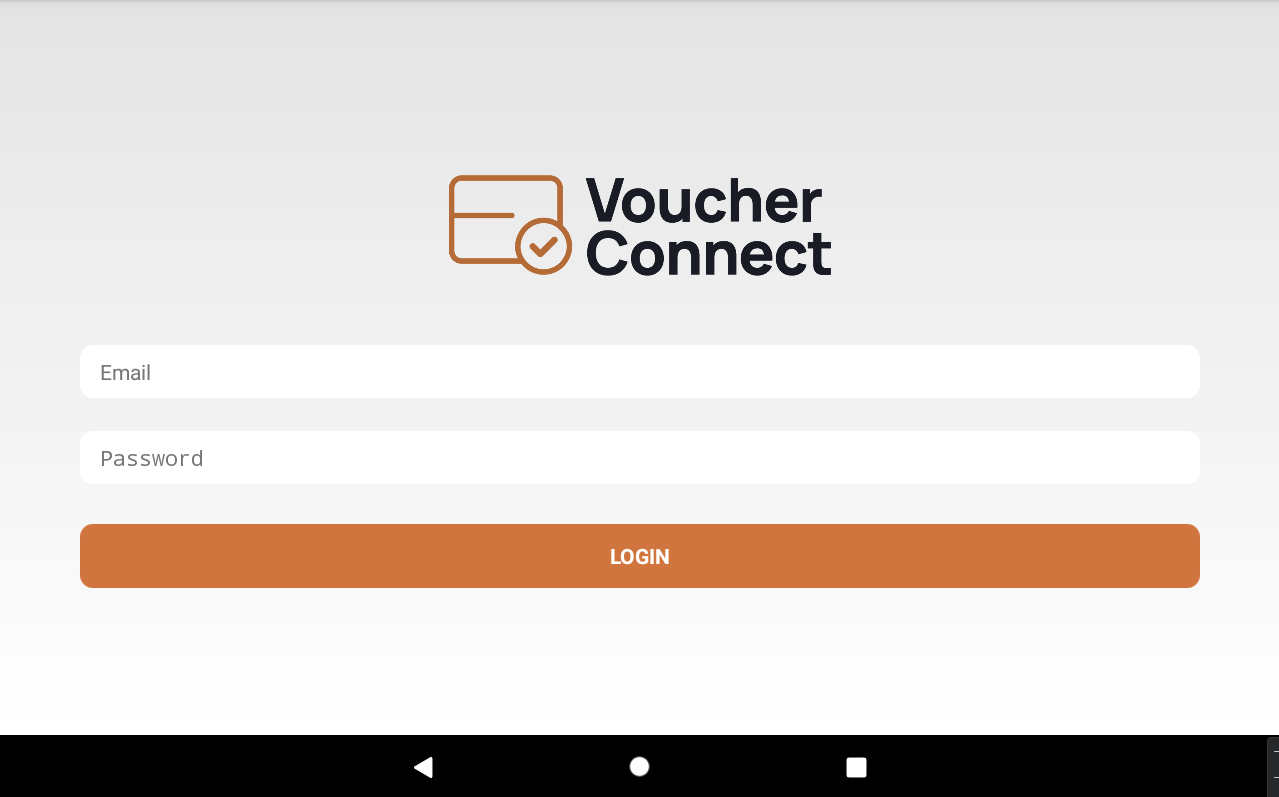
Open your Voucher Connect Dashboard, click on Settings, and click Integrations on the left hand side. In the Clover integration box, enter your Merchant ID and click Connect.

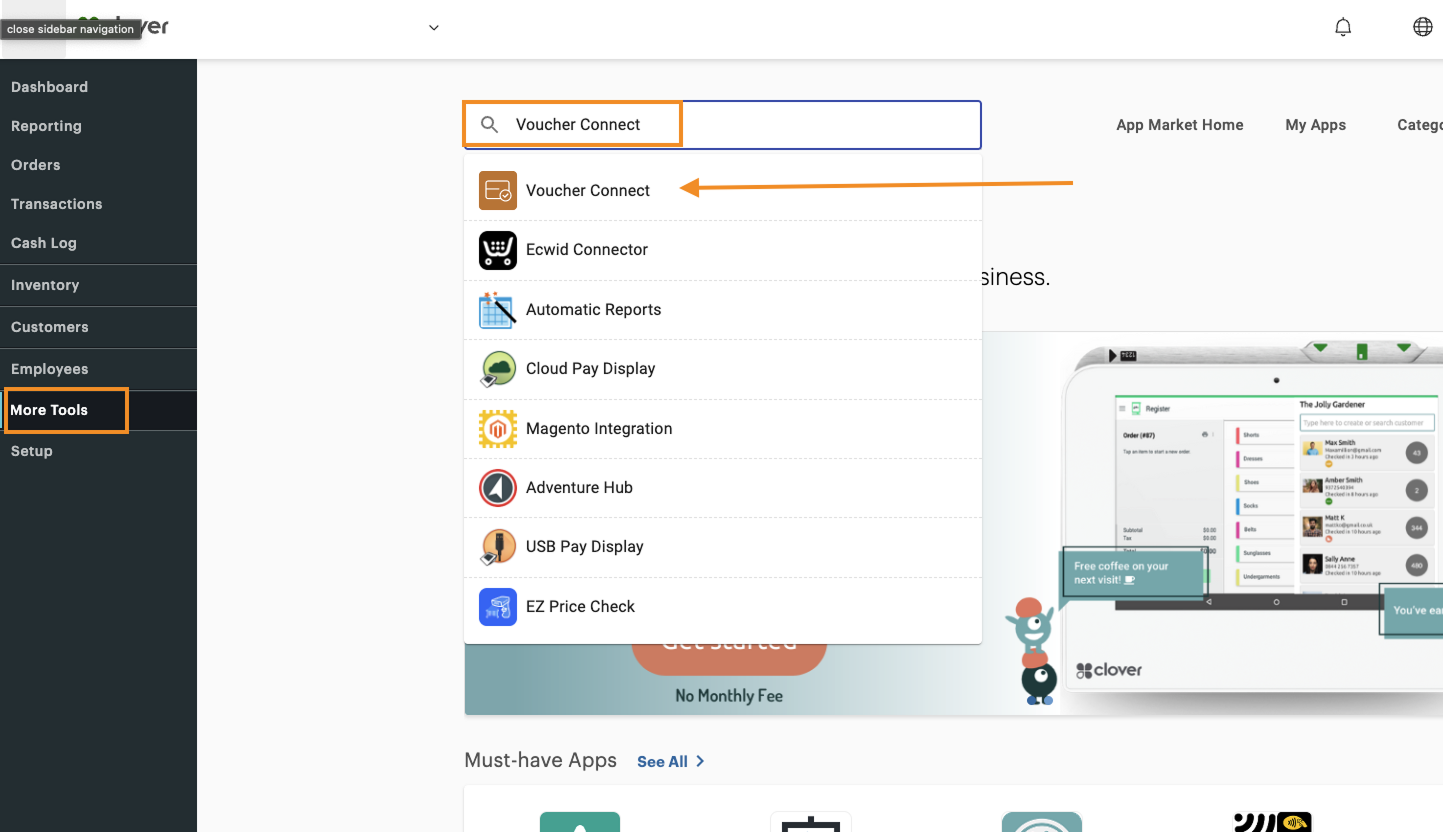
Go to your Clover dashboard & select More Tools from the lefthand side menu.
Search for Voucher Connect in the search box.
Click Connect.
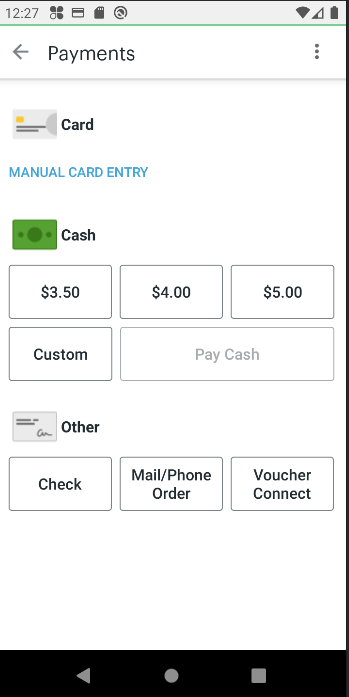
Activate the Voucher Connect payment button on Clover Terminal
On your Clover terminal you will now see Voucher Connect as a payment type.
The first time you click this you will be asked to enter your Voucher Connect login details. Enter your details and Login
You are now integrated and start redeeming directly from Clover!
Sell Vouchers online and redeem them within your Phorest system.
Voucher Connect lets you sell vouchers online. Phorest users can activate the Phorest integration so that they can see and redeem their Voucher Connect vouchers from within Phorest.
To activate the integration, we need a little bit of information from Phorest support so that we can connect with your Phorest system. Send a message to [email protected], and let them know you’d like to activate the Voucher Connect integration. They’ll send you back a Business ID that’ll we’ll use in the next step.
You’ll need:
Once you have those, in Voucher Connect, head over to Settings, and then click Integrations.
Click the Phorest integration switch, input the details discussed above, and click Save.
That’s all there is to it, you’ll now be able to see your Voucher Connect vouchers inside Phorest.
If you have a WooCommerce store, you can connect it to Voucher Connect, and your customers can use their vouchers in your checkout.
To connect a WooCommerce store to Voucher Connect, all you need to do is create a key for Voucher Connect to use.
To do that, head over to your WordPress dashboard. In the sidebar, hover over WooCommerce, and go to Settings.
Inside the WooCommerce settings, click on the Advanced tab and then click on REST API just underneath.

Next, click on the Add Key button to create a key for Voucher Connect to use.
On the key creation page, enter any description you like, perhaps “Voucher Connect”, and then set the Permissions to Read/Write.
Then click generate API key.
On the next page, you’ll find your Consumer Key, and your Consumer Secret. We can add these two strings of text to Voucher Connect to activate the integration.

You’ll need these two strings of text for the next step, so leave this browser tab open for a moment.
In a new browser window, go to your Voucher Connect dashboard, click on Settings, and then go to the Integrations section. In the WooCommerce integrations box, paste in your Consumer Key and Consumer Secret.
Click Save.
Voucher Connect uses WooCommerce’s “Coupons” system to work, so please ensure that you have enabled Couponds via the Enable the use of coupon codes switch which you can find in your WooCommerce general settings.

Thats all there is to it. After a few minutes for the initial sync, your Voucher Connect vouchers will work within your WooCommerce checkout, via the Promo Code
Vouchers will now give a discount if they are entered into the “Promo code” section of your WooCommerce checkout.
When a voucher is used, Voucher Connect will deduct the discount from the balance on the voucher. Once the balance on the voucher has been fully redeemed, it will no longer give any discounts on your WooCommerce checkout.
Adding Voucher Connect to your website is straightforward, it works on most website platforms, such as WordPress, Wix, Squarespace and more.
We need to tell your website how to find your Voucher Connect store, so the first thing to do is get your storefront’s URL. You can get this by logging into the dashboard and clicking the button that says Copy Store Link.
That button will copy your store address to your clipboard. It looks something like https://yourstore.voucherconnect.com
Now that you have your storefront URL, head over to your WordPress website and log in to the dashboard.
Find Appearance in your sidebar, and then click on Menus

Then, in the menu controls page, find the tab called Custom Links and paste your Voucher Connect storefront URL into the box labeled URL. In the Link Text box, type Vouchers. After that, click Add to Menu.

Your Vouchers menu item will appear at the bottom of the list, which will mean its the furthest to the right in your menu. If you’d like to change that position, you can drag the item up and down the list.

If your menu item is indented like in the screenshot above, on your website it will appear in a dropdown menu.
We recommend creating a Top Level menu item (not indented), so that your visitors can see at a glance that you have Vouchers available. See the example below:

That’s all there is to it. There should now be a link in your navbar called Vouchers, and your customers will be able to buy Vouchers straight away.